Home/blog/Why Two Tire Pressure Tools Sometimes Show Different Readings/
Why Two Tire Pressure Tools Sometimes Show Different Readings
August 26th , 2026 | AstroAI *
Tire Pressure Troubleshooting Guide | August 26, 2026
Why Two Tire Pressure Tools Sometimes Show Different Readings
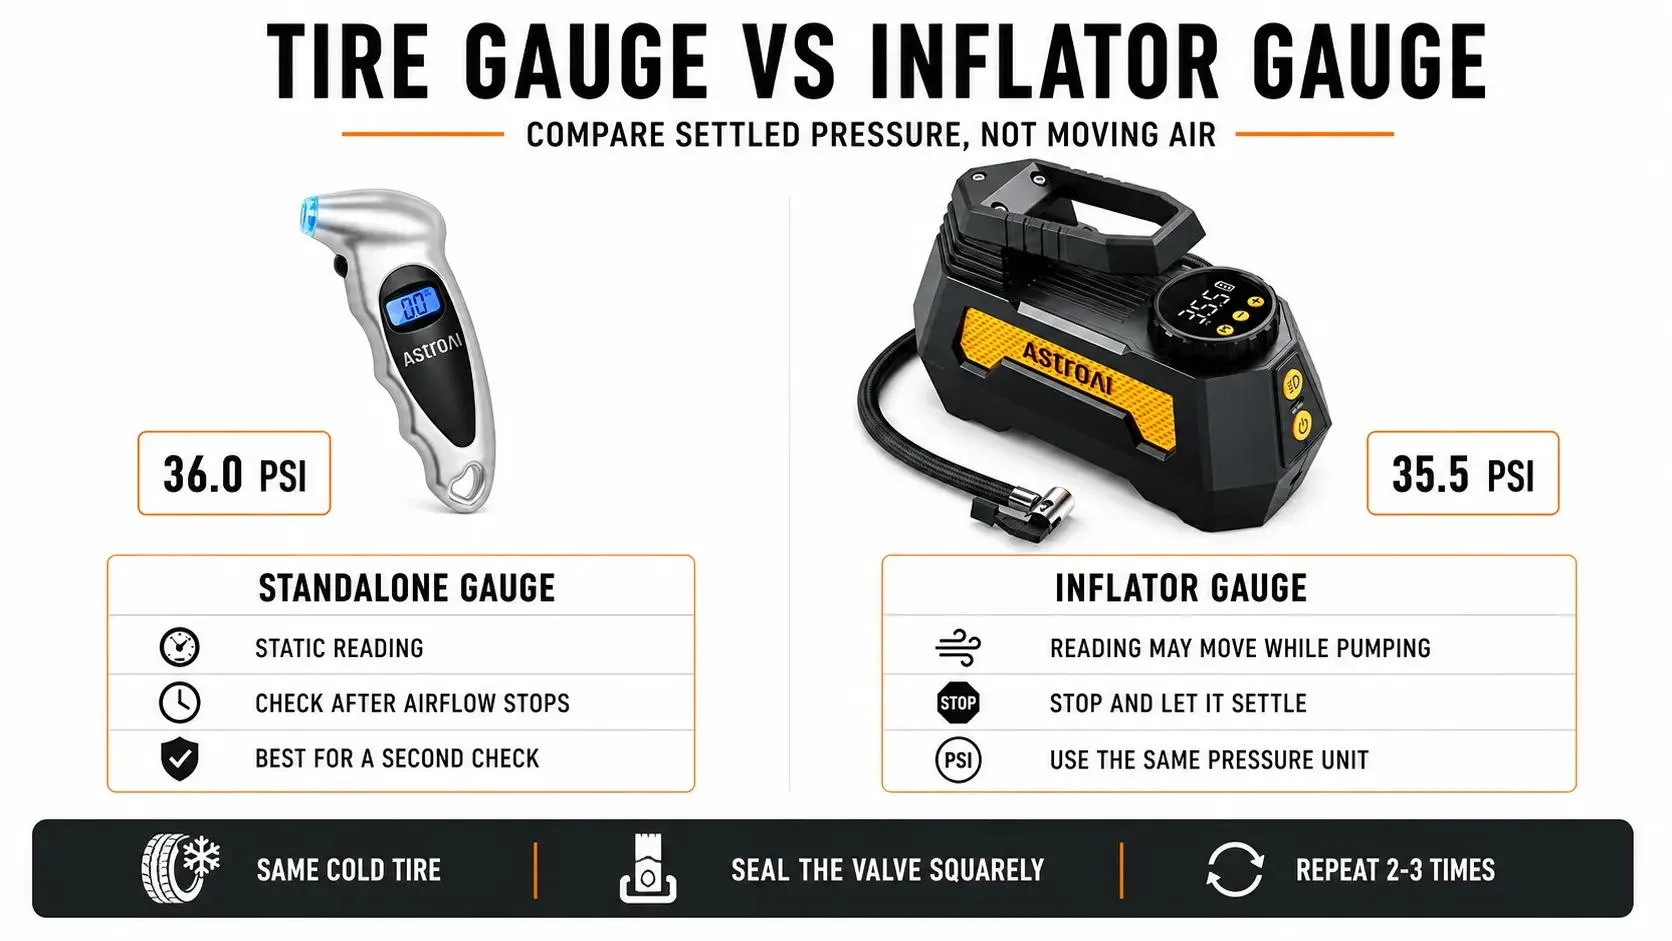
Two tools used to measure the same tire may occasionally show slightly different readings even when both are operating normally. That does not mean a standalone gauge and a pressure-reading inflator inherently measure different kinds of tire pressure. The result can change with measurement timing, whether air is still moving, tire temperature, valve sealing, display resolution, and each individual tool's stated tolerance. Compare the tools on the same cold tire, in the same pressure unit, after airflow stops and both readings settle. A small, repeatable offset may be normal; a large, unstable, or growing gap calls for a connection, battery, valve, or tool check.
Quick Answer
The tool category alone does not explain a different number. First check whether both measurements were taken after airflow stopped, on the same tire, and with a secure valve connection.
Control tire temperature and timing. A warm tire normally reads higher than the same tire when cold, so readings taken before and after driving are not directly comparable.
Look for repeatability, not a winner. Individual tools can show a small stable offset because of calibration, stated tolerance, and rounding. Repeat each measurement under the same conditions before deciding that either tool has a problem.
The vehicle's recommended pressure should come from its tire-information placard or owner's manual and should normally be checked when the tires are cold. The maximum pressure molded on the tire sidewall is not the routine target pressure for the vehicle.
What the Numbers Actually Represent
Seven Reasons Two Tire Pressure Readings May Not Match
1. Air Is Still Moving
A reading taken while a pump is moving air can pulse or rise because of hose pressure, restriction at the valve, and pump cycling. Compare it only with another reading taken after airflow stops and the number settles.
2. The Tire Temperature Changed
Driving flexes and warms the tire, which raises its internal air pressure. A warm reading and a cold reading can differ even when the tools agree perfectly.
3. The Chuck Is Not Fully Sealed
A connector placed at an angle may hiss, leak, or show an unstable number. A clean, square connection is necessary before either reading can be trusted.
4. Each Tool Has Its Own Tolerance
Two individual consumer tools should not be assumed to match digit for digit. Compare any repeatable offset with the stated measurement tolerance for each model rather than attributing it to the product category.
5. Resolution Is Not Accuracy
A screen that changes in 0.1 PSI increments provides fine display resolution, but that does not mean the complete instrument is accurate to +/-0.1 PSI.
6. Disconnecting Releases a Little Air
A brief hiss can come from the chuck or hose. Repeated checks, especially with a poor seal, can gradually reduce pressure and make later readings lower.
7. Battery or Sensor Condition Matters
A weak battery, damaged hose, contaminated connector, worn valve core, or damaged sensor can make a reading slow, inconsistent, or obviously implausible.
Compare the Measurement Conditions Before the Numbers
The biggest source of confusion is comparing two different measurement states. When any pressure-reading inflator is actively pushing air, its display can be influenced by pressure in the pump, manifold, or hose path. Flow restriction at the valve and pump pulsation can make the number move above or below the pressure that remains after the airflow stops.
Once airflow stops, pressure in the hose and tire begins to equalize and the display can settle. A second tool placed on the same valve is also taking a settled measurement, but its own sensor, seal, resolution, and tolerance still apply. The fair comparison is therefore settled reading against settled reading under the same conditions, not one tool category against another.
Reading state
What it may represent
Use it for final adjustment?
Inflator running
Dynamic pressure affected by airflow, hose restriction, and pump pulsation
No; stop airflow first
Inflator stopped and display settled
Static pressure after the air path begins to equalize
Yes, within the tool's stated tolerance
Standalone gauge on the same valve
A separate static reading with its own sensor, seal, resolution, and tolerance
Yes, when stable and repeatable
Reading after driving
Warm-tire pressure, which is normally higher than cold pressure
Do not bleed down to the cold target solely because it reads higher
Choose the Tool for the Workflow
Three Useful Pressure-Checking Setups
Each setup can be part of the same tire-pressure routine. The practical choice depends on whether you only need to check pressure, want to adjust pressure with a shop compressor, or need portable inflation. None of these formats should be expected to produce a fixed higher or lower reading simply because of its type.
Routine reference checks
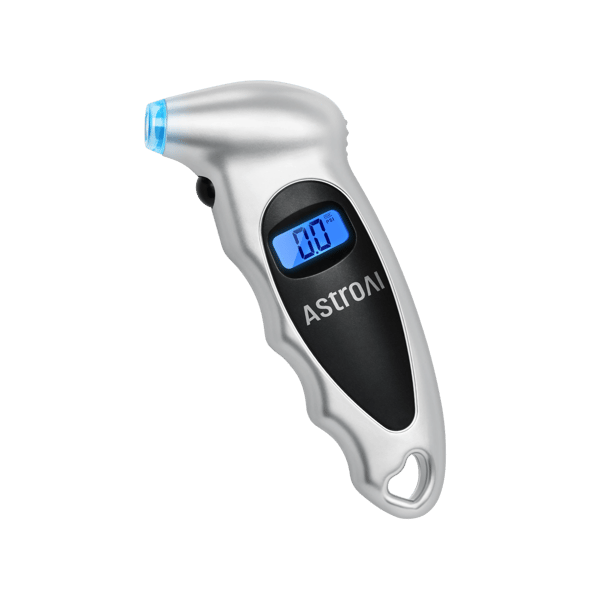
AstroAI Digital Tire Air Pressure Gauge 150 PSI, Silver
Verified summary: A compact 0-150 PSI digital gauge with four selectable pressure units, 0.1 display increments, a backlit LCD, and a stated measurement error of +/-1 PSI.
Best fit: Cold-tire checks, glove-box storage, monthly maintenance, and taking a second settled reading when another result appears unusual.
Pros: Its compact format makes it easy to reconnect to the same valve and check whether repeated settled readings remain consistent.
Cons / Not best for: It measures pressure but does not add air. Its 0.1 display increment should not be confused with +/-0.1 PSI total accuracy.
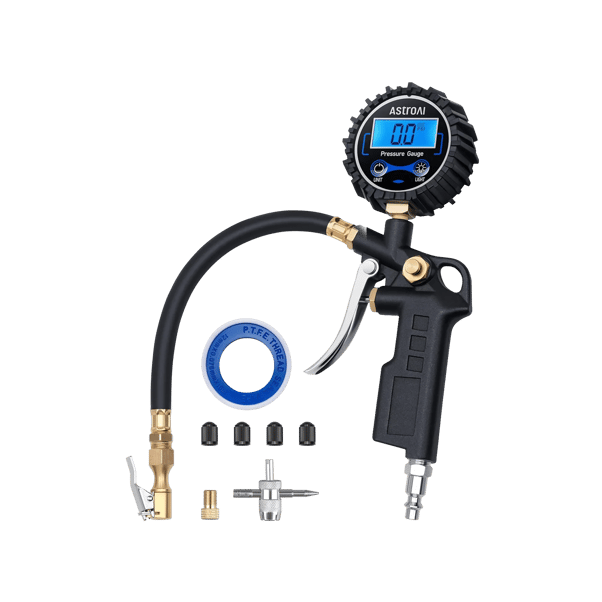
Verified summary: A 3-in-1 digital inflator gauge with a 3-250 PSI range, 0.1 display resolution, four pressure units, two AAA batteries, and a stated measurement error of +/-1.5 PSI.
Best fit: A garage with a compatible air compressor where the user wants to measure, add air, and release excess pressure without changing tools.
Pros: Integrated inflate and bleed controls reduce tool switching. The display can be read again after the trigger is released and airflow stops.
Cons / Not best for: It requires an external compressor. Record the comparison reading only after releasing the trigger and allowing the number to settle.
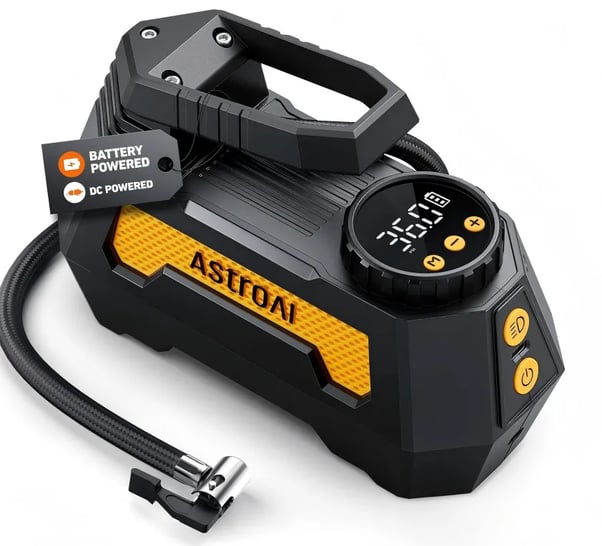
Verified summary: A 150 PSI portable inflator with battery and DC 12V power, four pressure units, pressure preset, automatic shut-off, and a digital display. The published comparison records 60 seconds for a 30-36 PSI top-off on a 195/65R15 tire.
Best fit: Driveway top-offs and everyday vehicle carry when one portable tool needs to measure and add air.
Pros: Dual power provides cordless placement with vehicle-power backup. Preset and automatic shut-off simplify routine adjustments.
Cons / Not best for: The referenced comparison does not publish a sensor accuracy tolerance for H2 Pro, so do not infer one from the display's digits. If checking it against another tool, stop the pump and wait for both readings to settle.
How to Check Whether Two Tire Pressure Readings Really Differ
Use one tire as the test object and control the conditions. The goal is not to force identical last digits or prove that one tool format is better. It is to learn whether each individual tool produces stable settled readings and whether any repeatable offset remains consistent with the stated tolerances.
1
Let the tire cool.
Park the vehicle for at least three hours so the tire is cold, then use the recommended pressure on the vehicle placard or in the owner's manual as the target.
2
Inspect the valve and tools.
Check the valve stem, chuck, hose, and batteries. Do not continue if the valve is damaged or either tool shows an error, blank screen, or obvious physical damage.
3
Set both tools to the same unit.
Select PSI, kPa, bar, or kg/cm2 on both displays. Do not compare values shown in different units or values rounded to different scales.
4
Take two readings with the first tool.
Press the tool squarely onto the valve until the seal is quiet. Remove it, reconnect it, and record both settled readings to check repeatability.
5
Take a settled reading with the second tool.
Attach the second tool squarely. If it can add air, do not start the pump or press the airflow trigger; first record its resting reading.
6
Add air only if needed.
Inflate toward the placard target, but treat any fluctuating number during airflow as a working indication rather than the final static pressure.
7
Stop airflow and let the display settle.
Stop the pump or release the trigger, keep a secure connection, and wait until the displayed pressure stops changing before recording it.
8
Repeat the first measurement promptly.
Reconnect the first tool to the same valve and compare all settled results with each tool's stated tolerance and repeatability.
What the Difference Pattern Tells You
Pattern
Likely explanation
Next action
A reading changes only while air is flowing
Dynamic airflow and hose pressure
Compare after airflow stops
Both tools read higher after driving
Normal warm-tire pressure increase
Recheck cold; do not bleed to the cold target while warm
Inspect and retest; stop relying on the tool if instability remains
Pressure drops across repeated checks
Air loss during repeated connection or a leaking valve
Minimize reconnections and inspect the valve for leakage
Common Comparison Mistakes
Comparing during active inflation: A moving-air reading is not a settled tire reading.
Taking the first reading cold and the second warm: The temperature change can be larger than the difference between the tools.
Using the tire sidewall maximum as the target: Use the vehicle placard or owner's manual instead.
Assuming more display digits mean better accuracy: Resolution and measurement tolerance are different specifications.
Ignoring a hiss at the valve: A poor seal can affect the reading and release air.
Choosing the most convenient number: Repeat the measurement under controlled conditions instead of selecting the preferred result.
The Practical Bottom Line
Two tire-pressure tools may occasionally show slightly different numbers without either product being defective. First make the test fair: same cold tire, same valve, same unit, secure seals, no active airflow, and settled readings.
Use a standalone digital gauge for quick checks, a 250PSI-M with a compatible shop compressor, or H2 Pro when portable inflation and pressure display need to travel together. These are workflow choices, not fixed reading hierarchies. If one tool remains unstable or the gap is larger than the tools' stated tolerances, inspect the connection and stop relying on the questionable reading until the cause is resolved.
Frequently Asked Questions
Why does my tire gauge read differently from my inflator?
The two measurements may have been taken under different conditions. Airflow state, timing, tire temperature, valve sealing, display resolution, and each individual tool's stated tolerance can all affect the result. The difference is not automatically caused by one being a tire gauge and the other being attached to an inflator.
Which reading should I trust?
Trust a settled, repeatable reading taken on a cold tire with a secure seal and a tool operating within its stated tolerance. Do not select one tool only because it shows the number you expected.
Is the inflator reading accurate while the pump is running?
Treat the running display as a working indication, not the final static pressure. Airflow, pump pulsation, and hose restriction can make the number change. Stop airflow and wait for the display to settle before comparing it.
How much difference between tire gauges is normal?
There is no single acceptable difference for every pair of tools. Compare the repeatable offset with each model's stated measurement tolerance. The silver AstroAI digital gauge states +/-1 PSI, while the 250PSI-M states +/-1.5 PSI.
Does a 0.1 PSI display mean the gauge is accurate to 0.1 PSI?
No. A 0.1 PSI display increment describes resolution, not total measurement accuracy. Always check the model's stated measurement tolerance separately.
Why does tire pressure rise after driving?
Driving warms the tire and the air inside it, so pressure normally rises. Compare tools when the tire is cold, meaning the vehicle has not been driven for at least three hours, whenever possible.
Can checking tire pressure repeatedly lower it?
Yes, repeated connections can release small amounts of air, especially if the chuck is attached at an angle or does not seal quickly. Use a square connection and avoid unnecessary repeated checks.
Should I keep a separate tire gauge if my inflator has a display?
A separate gauge can be useful for quick cold-tire checks and for taking a second settled measurement when another reading appears unusual. It is not mandatory for every driver, and it should not be assumed to read systematically higher or lower than an inflator display.
Use the silver digital gauge for independent cold-tire checks, 250PSI-M beside a compatible compressor, or H2 Pro when pressure display and portable inflation need to stay together.