Student Electrical Tools • Lab Selection Guide • 2026
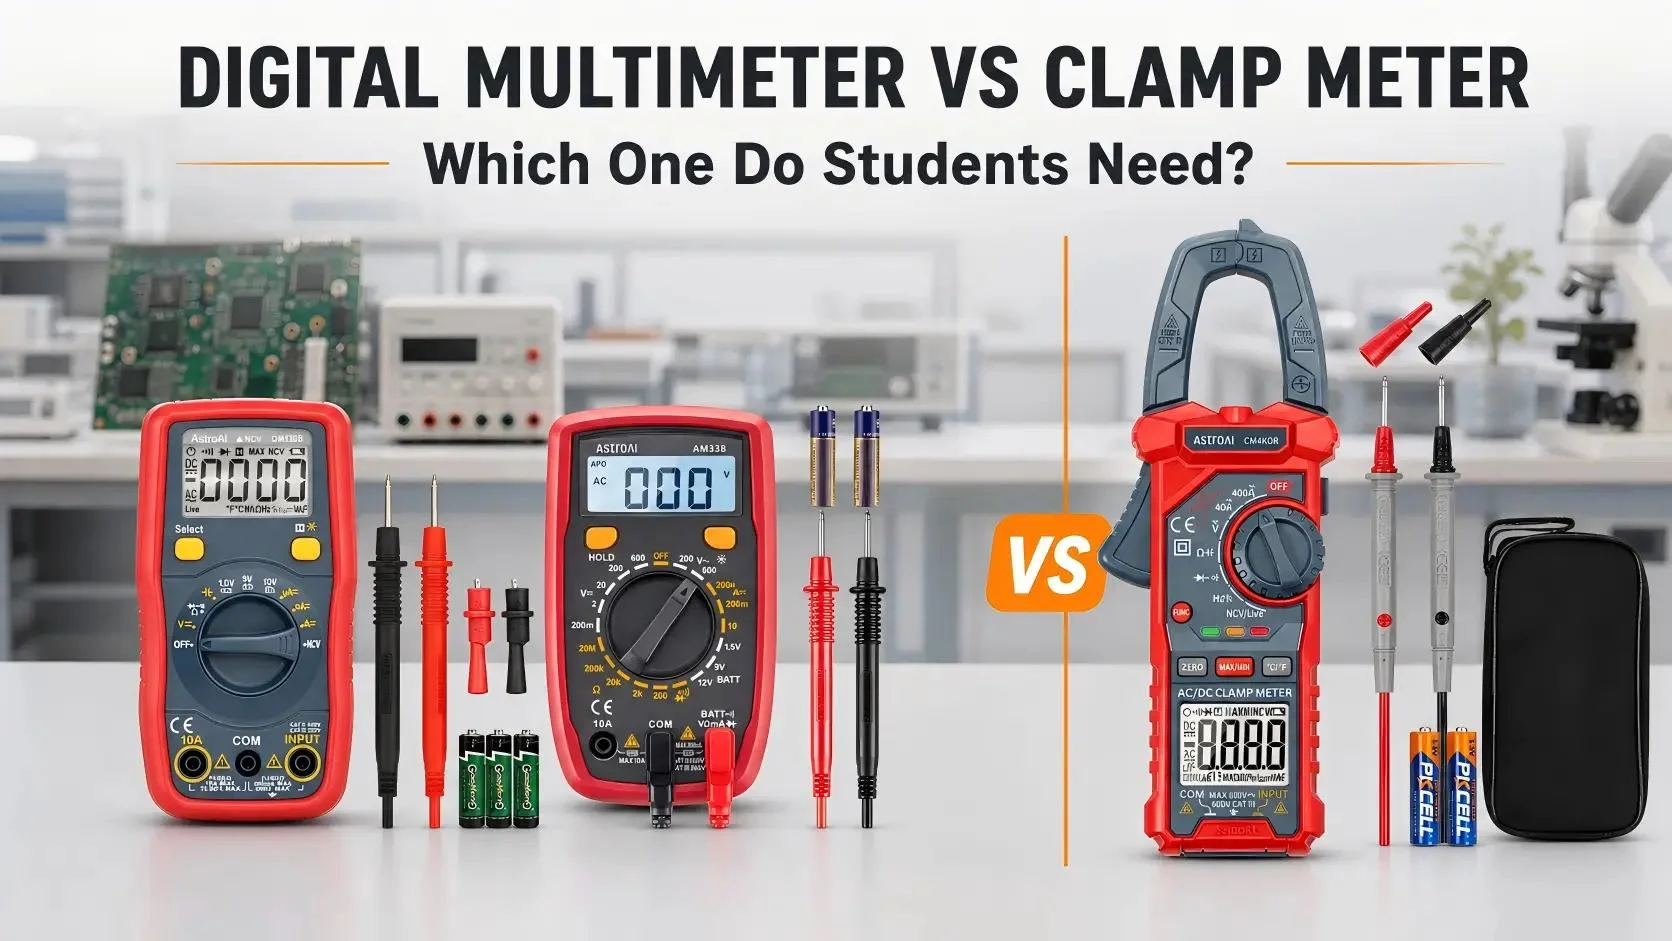
Digital Multimeter vs Clamp Meter: Which One Do Students Need?
Most students should buy or receive a digital multimeter first. A multimeter is better suited to breadboards, batteries, sensors, resistors, continuity checks, diode tests, and low-current experiments because it can resolve the measurements used most often in introductory electronics. A clamp meter becomes the better choice when a course regularly measures current on an accessible single conductor without opening the circuit, especially in HVAC, motor, power, renewable-energy, and automotive electrical training.
The tools overlap, but they are not interchangeable. The right decision depends on what students will measure, the size and type of current involved, whether the circuit may be opened safely, and the lab's required measurement category and procedures.
Quick Answer
- Choose a digital multimeter first for general electronics, breadboards, component checks, batteries, vehicle voltage checks, continuity, and low-current lab circuits.
- Choose a clamp meter first only when the curriculum centers on motor loads, HVAC equipment, building wiring, charging systems, solar or battery conductors, or other accessible conductors carrying current within the clamp meter's rated range.
- Choose both for advanced technical programs in which students must diagnose a circuit with test leads and also observe running current without disconnecting the load.
- For most student kits: DM130B is the balanced digital starting point, AM33B is the simpler manual-range option, and CM4K0R is the current-focused clamp option.
AstroAI Student Recommendations
Three sensible starting points based on the course
These models are alternatives for different learning goals, not a ranking based on price. Start with the measurements required by the syllabus and the instructor's approved safety procedure.
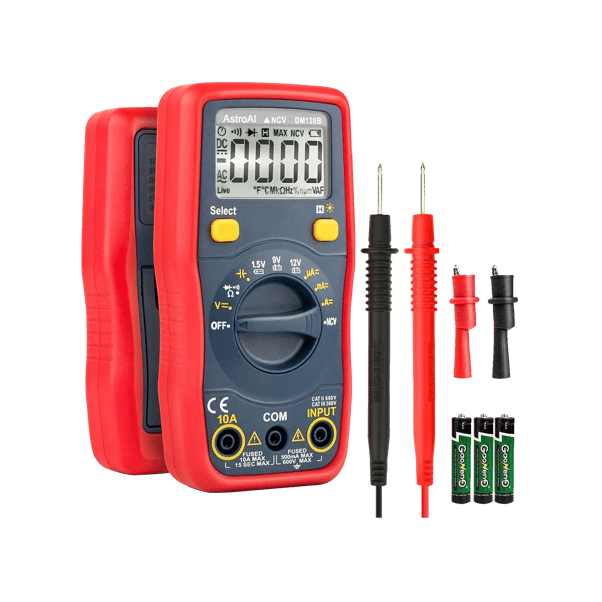
Balanced first meter
AstroAI DM130B — 4000-Count Digital Multimeter
Best for: electronics students who want automatic ranging plus manual control for mixed circuit, battery, capacitance, continuity, and basic diagnostic work.
- 4000-count display
- Automatic and manual range selection
- AC/DC voltage and current, resistance, continuity, diode, and capacitance functions
- NCV screening, backlight, Data Hold, and automatic power-off
Why it fits: It reduces range-selection friction for beginners while retaining enough function coverage for courses that move beyond the first breadboard exercise.
Pros: Broad beginner function coverage, automatic ranging for faster setup, and manual control for structured lessons.
Cons: It is not True RMS and still requires a series connection for current measurement.
Skip it when: The course requires True RMS measurements or current through a clamp jaw rather than a series-connected test circuit.
View DM130B
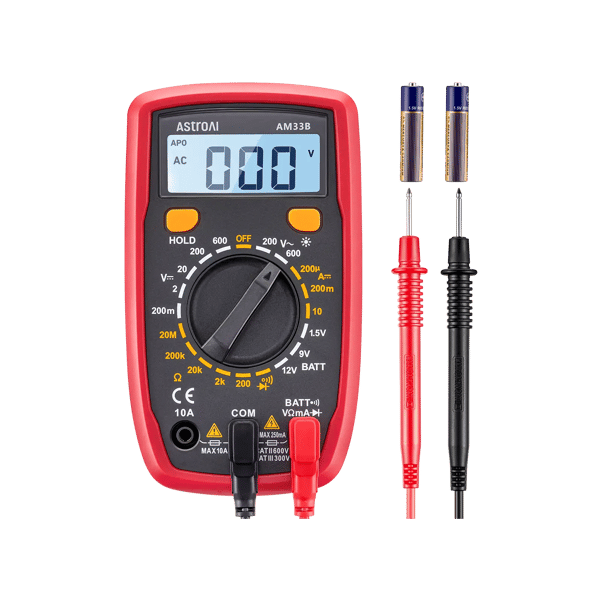
Introductory manual-range kit
AstroAI AM33B — 2000-Count Manual-Range Multimeter
Best for: first electrical measurements, basic resistor labs, continuity practice, diode checks, low-voltage circuits, and courses that deliberately teach range selection.
- 2000-count display
- Manual range selection
- AC/DC voltage, DC current, resistance, continuity, diode, and hFE functions
- Backlight, Data Hold, and low-battery indication
Why it fits: The dial makes students think about expected magnitude and range before reading the display.
Skip it when: The syllabus requires capacitance, NCV screening, True RMS, automatic ranging, or clamp-current measurement.
View AM33B
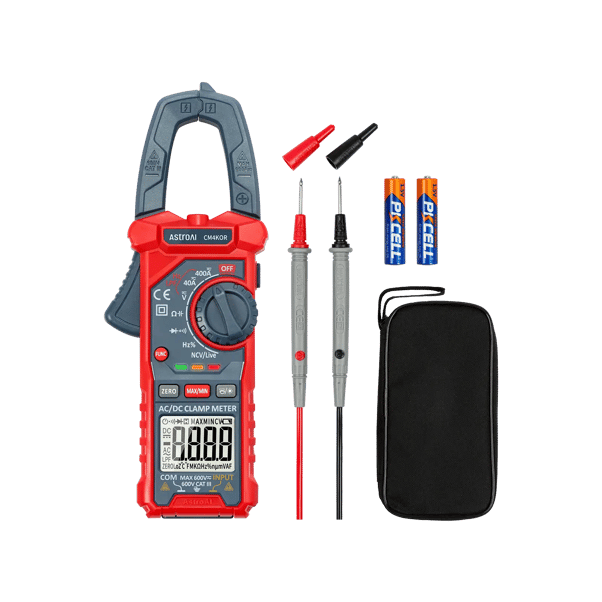
Current-focused technical labs
AstroAI CM4K0R — 4000-Count AC/DC Clamp Meter
Best for: supervised HVAC, motor, renewable-energy, power, and automotive electrical labs that need AC/DC current measurement around one conductor.
- 4000-count automatic-ranging display and True RMS
- AC/DC current through the clamp jaw up to 400A
- AC/DC voltage, resistance, continuity, diode, capacitance, and frequency functions
- NCV screening, live-wire mode, backlight, flashlight, and zero function
Why it fits: Students can observe load current without placing the meter in series, while test leads retain common multimeter functions.
Skip it when: The course mainly measures small breadboard currents, where jaw size and clamp resolution are less practical than a digital multimeter.
View CM4K0R
The Core Difference: How Each Tool Measures Current
A digital multimeter normally measures current by becoming part of the circuit. The student moves the red lead to the correct current jack, selects the current function and range, opens the circuit, and connects the meter in series. This is appropriate for controlled low-energy lab circuits when the current is within the meter, jack, lead, and fuse limits.
A clamp meter senses the magnetic field around one conductor, so the circuit can remain intact. That is more convenient for running motors, appliance loads, charging conductors, and other higher-current work. However, clamping around an entire two-conductor cable can cancel the magnetic fields and produce a near-zero reading. Small milliamp breadboard currents may also fall below the clamp meter's useful resolution.
| Question |
Digital Multimeter |
Clamp Meter |
Student Decision |
| How is current measured? |
Meter inserted in series with the circuit. |
Jaw closes around one accessible conductor. |
Use a multimeter for small controlled circuits; use a clamp for nonintrusive load-current checks. |
| Best current scale |
Low-current electronics within the printed jack and fuse limits. |
Larger running currents within the jaw's AC/DC capability and range. |
Do not select by maximum amperage alone; resolution at the expected current matters. |
| Breadboards and components |
Strong fit for voltage, resistance, continuity, diode, and small-current work. |
Jaw is usually too large and current may be too small for useful resolution. |
Digital multimeter first. |
| Motors, HVAC and charging conductors |
Useful for voltage, resistance, continuity and component-level checks. |
Better for observing running current without opening the circuit. |
Clamp meter first for current-focused modules; both for complete diagnostics. |
| Voltage and continuity |
Core use through test leads. |
Often available through test leads, depending on model. |
Either can work, but a digital multimeter is usually easier to hold and place on a crowded bench. |
| Main student error |
Applying the current jack across a voltage source or exceeding the fused input. |
Clamping around both conductors, choosing the wrong AC/DC mode, or skipping zeroing for DC. |
The teaching plan should include setup verification before any energized measurement. |
Student Safety Boundary
Students should learn meter setup on instructor-approved low-voltage circuits before progressing to higher-energy work. Always verify the selected function, range, lead jack, test-lead condition, fuse status, and the rating printed on the instrument before making contact.
Never measure resistance, continuity, diode behavior, or capacitance on an energized circuit. NCV is a screening feature, not proof that a circuit is safe. Energized panels, service equipment, exposed conductors, and unfamiliar high-energy systems require qualified supervision, appropriate protective equipment, and instruments rated for that specific environment.
Which Tool Fits Each Student Scenario?
Course outcomes matter more than the number of functions printed on the dial. A tool is useful only when its measurement method matches the lab.
Introductory circuits and physics labs
Choose a digital multimeter. Students need to learn potential difference, resistance, continuity, polarity, series versus parallel connections, and expected range. AM33B makes manual range selection part of the lesson; DM130B reduces setup friction with automatic ranging.
Electronics, robotics and embedded systems
Choose a digital multimeter first. Sensor supply rails, logic-level voltage, resistor checks, diode behavior, continuity and small current draw are better matched to probes and a compact bench-oriented meter. A clamp meter may join the kit later for larger motor or battery leads.
Automotive electrical training
Start with a digital multimeter, then add a DC-capable clamp meter. A DMM handles 12V battery voltage, charging voltage, voltage drop, continuity and fuse checks. A DC clamp meter is useful for larger charging, accessory or motor currents when one conductor is accessible. The tool does not determine engine size; the circuit's expected current does.
HVAC, motors and appliance service
A clamp meter often deserves priority. Running current is a common diagnostic input, and opening the load circuit to insert a DMM is often impractical. A model such as CM4K0R also retains lead-based voltage, resistance, continuity, capacitance and frequency functions.
Power, solar and battery-system programs
Use both, selected by current type and range. Test leads support voltage and de-energized checks; the clamp jaw supports current observation. Confirm whether the current is AC or DC, the expected magnitude, conductor access and the instrument's printed ratings.
Shared classroom kits and procurement
Standardize around the most common lab, then add specialty tools. A large pool of digital multimeters supports broad first-year use. A smaller set of clamp meters can serve supervised current-focused stations, reducing cost and the chance that students use the wrong tool for low-current bench work.
Published Capability Comparison
AM33B vs DM130B vs CM4K0R
This table focuses on functions that change a student's workflow. It does not substitute for the exact manual, instrument label, fuse limits, lead ratings, or instructor procedure.
| Feature |
AM33B |
DM130B |
CM4K0R |
Best Fit |
| Tool type | Digital multimeter | Digital multimeter | Digital clamp meter with test leads | Choose by current method |
| Display count | 2000 | 4000 | 4000 | Resolution and range changes |
| Range selection | Manual | Automatic and manual | Automatic | Teaching control vs speed |
| True RMS | No | No | Yes | Non-sinusoidal AC coursework |
| Voltage range | AC 600V / DC 600V | AC 600V / DC 600V | AC 600V / DC 600V | Verify printed rating and lab environment |
| Current capability | DC through fused input, up to 10A | AC/DC through fused input, up to 10A | AC/DC through jaw, up to 400A | Small series current vs larger clamp current |
| Resistance | Up to 20 MΩ | Up to 40 MΩ | Up to 40 MΩ | All support common de-energized checks |
| Capacitance | No | Yes | Yes | Useful for component and HVAC modules |
| NCV screening | No | Yes | Yes | Screening only, not proof of de-energization |
| Best student use | Basic circuits and range-selection training | Broad electronics and mixed troubleshooting labs | AC/DC load-current and technical-service labs | Match the lab, not the longest feature list |
Seven Selection Factors for Students and Lab Managers
1. Required measurements
List every graded measurement in the syllabus. Voltage, resistance, continuity, diode and small-current exercises point toward a DMM. Repeated running-current measurements point toward a clamp meter.
2. Expected current magnitude and resolution
A 400A jaw range does not automatically make a clamp meter useful for a milliamp circuit. Check the expected current, the available ranges and the display resolution at that current.
3. AC, DC or both
Some clamp meters measure only AC current through the jaw. Automotive, battery, solar and many robotics circuits require DC current capability. Never infer DC support from the presence of a clamp alone.
4. Circuit access
A clamp meter needs one separated, accessible conductor. A molded cable containing both supply and return conductors may produce a near-zero reading. A digital multimeter needs suitable test points and, for current, a circuit that can be opened safely.
5. Learning objective
Manual ranging reinforces magnitude and scale. Automatic ranging reduces setup errors and speeds repeated checks. Neither is universally better; choose the behavior the course is meant to teach.
6. Safety category and input protection
The instrument, leads and accessories must match the actual measurement environment. Confirm the printed category, voltage limits, current-input fuse requirements and instructor procedure rather than relying on a generic product description.
7. Sharing, storage and replacement
For class sets, consider lead storage, battery type, readable labeling, protective cases, spare fuses, probe replacement and how quickly an instructor can verify every unit before a lab.
Repeatable Classroom Evaluation
How to Compare a Digital Multimeter and Clamp Meter Fairly
A fair comparison uses the same controlled circuit, the same expected values, the same conductor and documented setup steps. This routine checks usability and consistency; it is not a calibration certificate or an independent metrology claim.
- 1
Define the lab task. Write down the expected voltage, resistance and current range, whether the signal is AC or DC, and whether the circuit may be opened.
- 2
Inspect both instruments. Check the case, display, leads, jacks, clamp jaw, batteries, fuse information, printed ratings and manual before energizing anything.
- 3
Verify voltage and resistance on low-energy references. Use an instructor-approved source and resistor. De-energize and discharge the circuit before resistance or continuity measurements.
- 4
Measure current with the digital multimeter. On an instructor-approved low-current circuit, move the lead to the correct fused jack, select the correct function and connect the meter in series. Stop if the expected current approaches the input limit.
- 5
Measure current with the clamp meter. Select AC or DC current as required, zero the DC clamp when the manual calls for it, close the jaw around one conductor and center the conductor in the jaw.
- 6
Repeat and record the result. Take at least three readings without changing the circuit. Record stability, setup time, display readability, required instructor intervention and whether the value was large enough for useful clamp resolution.
Common Student Mistakes
- Choosing by display count alone: More counts do not fix the wrong measurement method or missing AC/DC current capability.
- Leaving the lead in the current jack: The next voltage measurement can create a hazardous short path.
- Measuring resistance on a live circuit: De-energize and discharge first.
- Clamping the whole cable: Opposing magnetic fields can cancel and show near zero.
- Expecting every clamp to read DC: Confirm DC jaw-current support before automotive or battery work.
- Treating NCV as a safety verdict: Use it only as an initial indication and follow the approved verification procedure.
How We Selected the Models and Data Sources
The comparison uses current published lineup data and model pages checked on August 3, 2026. Selection was based on student workflow rather than price: a simple manual-range DMM, a broader automatic/manual DMM, and a clamp meter that can measure both AC and DC current.
Final Recommendation
For a general student electronics kit, choose a digital multimeter first. DM130B is the more flexible starting point when automatic ranging, capacitance and NCV screening support the syllabus; AM33B is the simpler option when manual range selection is part of the lesson. Choose CM4K0R when the course routinely measures AC/DC current around accessible conductors in automotive, HVAC, motor, power or renewable-energy labs. Programs that teach complete diagnostics will eventually benefit from both tool types.
Frequently Asked Questions
Should a student buy a digital multimeter or clamp meter first?
Most students should buy a digital multimeter first because introductory labs usually emphasize voltage, resistance, continuity, components and small-current circuits. Choose a clamp meter first only when the course repeatedly measures running current on accessible conductors.
Can a clamp meter replace a digital multimeter?
A clamp meter can perform many multimeter functions through test leads, but it may not replace a compact DMM for breadboards, small currents and crowded component work. The jaw is optimized for current around a conductor, not every bench measurement.
Why can a digital multimeter measure smaller currents more conveniently?
A digital multimeter measures current directly in series and commonly provides ranges suited to controlled low-current circuits. A clamp meter must sense the conductor's magnetic field, so small breadboard currents may be below its useful jaw resolution.
Can every clamp meter measure DC current?
No. Some clamp meters measure only AC current through the jaw. Automotive, battery, solar and many robotics applications require a model that explicitly supports DC clamp-current measurement, such as CM4K0R.
Is a clamp meter better for automotive students?
Not as the only tool. A digital multimeter is the usual starting point for battery voltage, charging voltage, voltage drop, continuity and fuse checks. A DC-capable clamp meter adds nonintrusive current measurement for accessible battery, charging, accessory and motor conductors.
Does a V6, V8 or diesel engine determine which meter a student needs?
No. Engine type alone does not set the meter requirement. Select the tool from the circuit being tested, its expected AC or DC current, conductor access, required resolution and the instrument's printed ratings.
Is True RMS necessary for student labs?
True RMS is useful when students measure non-sinusoidal AC from dimmers, variable-speed drives, inverters or modern electronic loads. It is less important for basic DC breadboard exercises and clean low-frequency sine-wave demonstrations.
How many meters should a college lab buy?
Size the digital multimeter pool for the number of students or workstations in general labs, then add clamp meters for the supervised stations that actually require nonintrusive current measurement. This usually provides broader coverage than giving every beginner the same specialized tool.